Estimate overview
The estimate table has 3 main parts.Navbar

- Bobyard logo is navigation to takeoff and files page of this project
- The project name opens a popup for project details
- The dropdown menu is for navigation to the estimate page of other projects
- The search bar is searches for items and folders who’s names or descriptions contain the search
- Hit the ‘x’ to clear the search
- Change the zoom level of the estimate table
- The up arrow scrolls to the top of the estimate table
- The check lets you select all items (not folders. This lets you multi edit all the items easily)
- The four arrows pointing out expands all folders
- The four arrows pointing in collapses all folders
- Create new folder
- Create new item
- Create new assembly
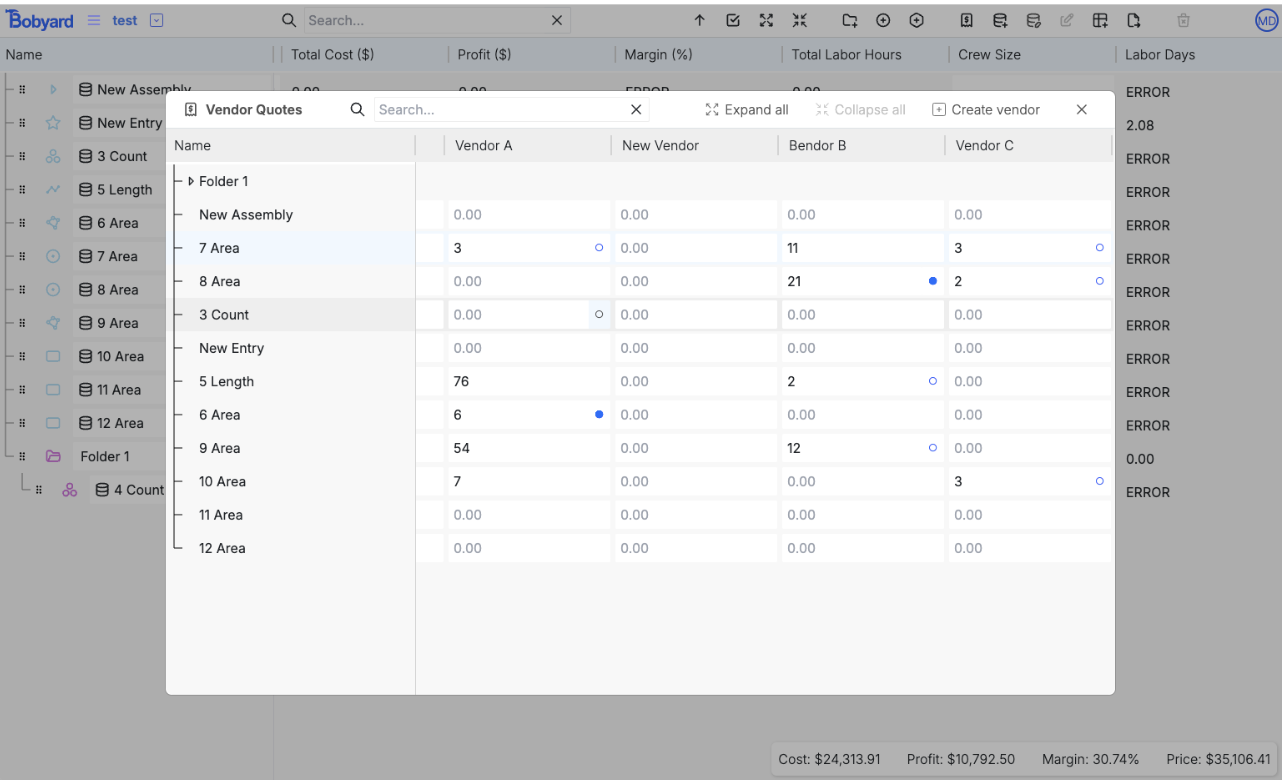
- Vendor quotes popup
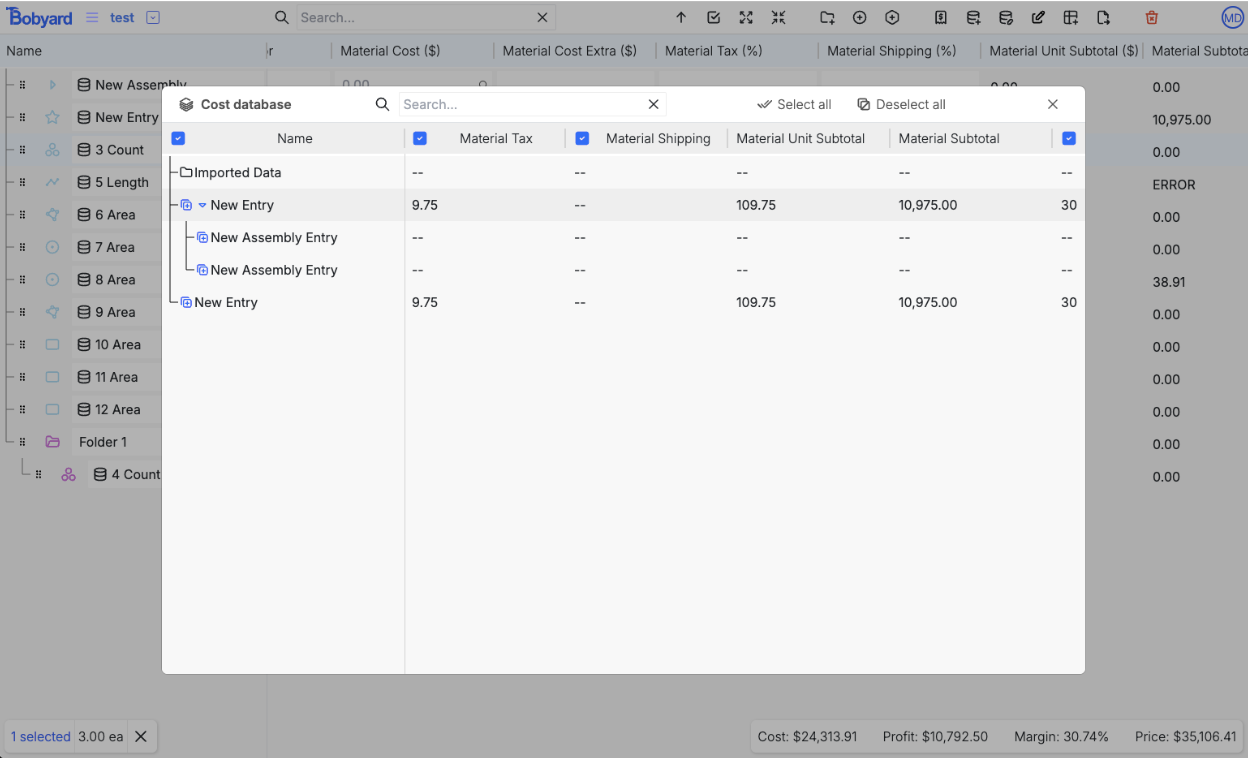
- Adding directly from database
- Copying values from database to all selected rows
- Editing values of all selected rows
- Popup for which columns are visible
- Export options (csv, excel, pdf and for the entire table or just the selected rows)
- Delete currently selected rows
The table
This table looks roughly like an excel spreadsheet. Click on a cell select the row. Holding down shift selects everything between two cells. Holding control (command on mac) will toggle the selection of the row.Frozen rows and columns
The first column is for the names of the rows and is locked. Each column afterwards are attributes for the row. This has the same functionality as the takeoff sidebar. You can drag and drop rows into folders. Right clicking will let you choose which folder to move something to. The first row is the column header and is locked. Clicking on them will toggle sorting up, down, and off. Dragging the little vertical lines between column headers lets you resize columns.Field types
Cells with white background are editable, grayish blue are view only. Cells that are editable and have a small circle on the right inside are calculated and overridable. This means that its value depends on the value of columns before it. Hovering over the column headers will tell you about the meaning of the columns. The calculated value is the placeholder text in the cell. If you edit and override the value, your new value will be used for future calculations. The circle will then turn solid blue. Clicking on the blue circle reverts back to the original calculated value.Details
Bottom left of the screen is a selected totals popup. It will tally up the sums of the measurements you have selected (whether it be area, length or count, etc). Bottom right is the total cost, profit, margin and price of the project.
Row types
There are four types of rows in the estimate tableItems
Measurements from the takeoff pages are converted to items in the estimate table. You can also add additional items in the estimate table, they won’t show up on the takeoff page.Groups
Groups do not have all the columns that items have (it does not make sense to say the page title of a group). It holds items and the columns are often the sum of the values of the items inside the group.Assemblies
These are a mix of items and groups. They have the same columns as items with the addition that you can add assembly entries inside them. The material cost and labor amount of assemblies are the sum of the assembly entries insideAssembly entries
These rows only have material cost and labor amountColumns
Visibility
The estimate popup in the navbar has two columns of checkmarks, one for items and one for groups (assemblies are treated like items here because they have the same columns). A filled in check means visible, and a crossed out gray check means that that column is not applicable to that row type. Columns that are not visible are still being calculated because they might be used in later visible columns.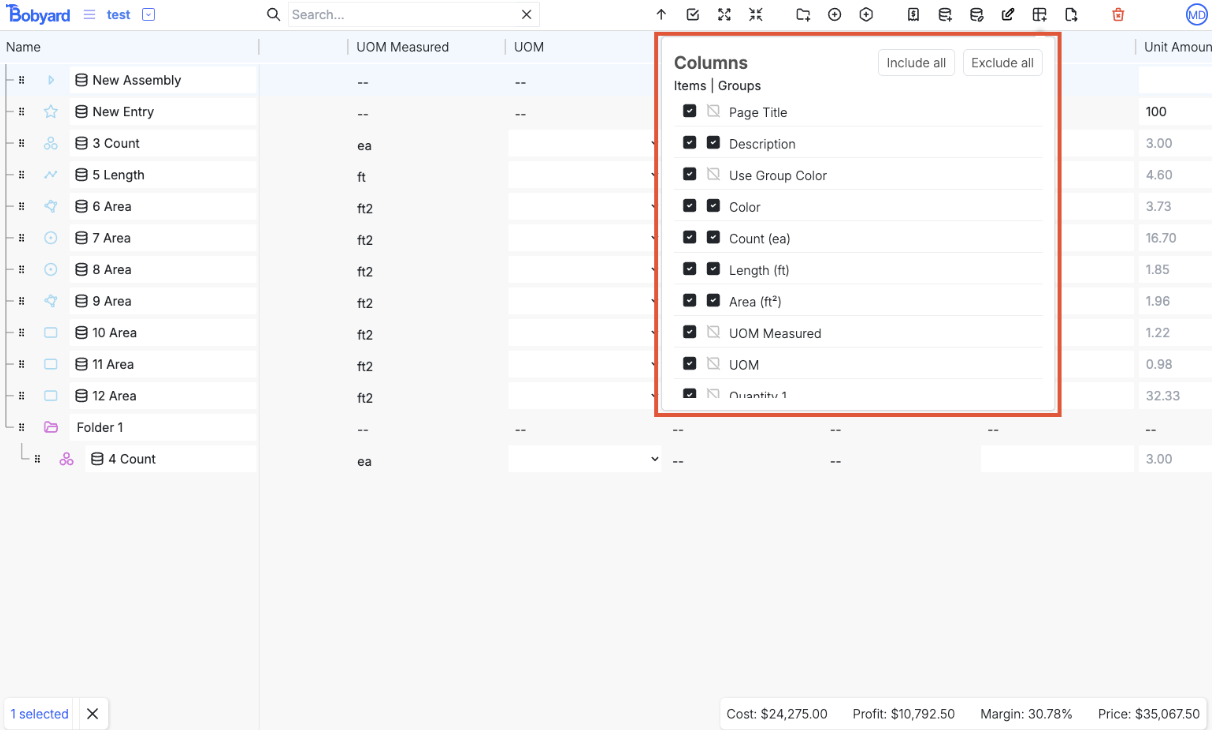
Columns overview
From left to right (or top to bottom on the popup):Details
- Page Title: if the time is tied to a measurement from the takeoff page, this is the name of the page that the measurement is on
- Description: this is just a text field
- Internal notes: use this field to keep internal notes
- Use group color: this is an attribute on the takeoff page as well. If this is on, then whenever this row is dragged to a different group, it’s color will change to match the new group
- Color: the color of the group. If you change the color manually, use group color will be turned false
UOM
- Count: if this item is tied to a count measurement, this is the count from the takeoff page
- Length: if this item is tied to a length measurement, this is the length from the takeoff page
- Area: if this item is tied to an area measurement, this is the area from the takeoff page
- UOM measured: if this item is tied to a measurement, this is the unit of measurement from the takeoff page. This is the default value as measured (counts are ea, lengths are ft, and all area measurements are ft2)
- UOM: this is the UOM that the item is to be converted to and used for the estimate
- Quantity 1 and Quantity 2: These are fields for the supporting values that might be needed to convert from UOM measured to UOM.
- For example, converting from length to area needs one additional value of length.
- If the supporting values are not needed, then the fields are disabled.
- The field will also tell you what the value needs to be and the units for it
- Pitch: the number of inches in rise over 12 inches of run
- Unit amount: the resulting value after converting to UOM.
- This field is calculated and editable meaning that you can override the value from the calculations
Material
- Material vendor: a text field
- Material cost: this is number field for the cost per unit of the material
- It is a calculated field for assemblies only. It is the sum of the entries in it
- Material cost extra: number field for any extra costs needed per unit
- Material tex: tax in percentage
- Material shipping: percentage used for calculating the total material unit cost
- Material unit subtotal: view only field. the cost per unit before markup
- (material cost + material extra cost) * (1 + material tax) * (1 + material shipping)
- Material subtotal: view only field. the cost of all units of material before markup
- (material unit subtotal * unit amount)
- Material markup: percentage markup on material
- Material unit total: calculated and overridable field for the total unit cost of the material
- (material unit subtotal * (1 + material markup))
- Material total: view only field. The total price of the materials after markup
- (material unit total * unit amount)
Labor
- Labor amount: number of hours per unit
- It is a calculated field for assemblies only. It is the sum of the entries in it
- Labor cost: dollars per hour for the labor
- Labor unit subtotal: view only field. cost per unit for labor before markup
- (labor cost * labor amount)
- Labor subtotal: view only field. Cost of all labor before markup
- (labor unit subtotal * unit amount)
- Labor markup: percentage markup on labor
- Labor unit total: calculated and overridable. total price per unit after markup
- (labor unit subtotal * (1 + labor markup))
- Labor total: view only. total price of all labor
- (labor unit toal * unit amount)
Subcontractor
- Subcontractor unit cost: cost per unit for subcontractors
- Subcontractor subtotal: view only. cost for all units for subcontractors before markup
- (subcontractor unit cost * unit amount)
- Subcontractor unit markup: percentage markup on subcontractors
- Subcontractor unit total: calculated and overridable. Total unit cost for subcontractors after markup
- Subcontractor total: view only. total price for subcontractors with markup
- (subcontractor unit total * unit amount)
Unit cost
- Unit cost: calculated and overridable.
- (material unit total + labor unit total + subcontractor unit total)
- Unit cost markup: percentage markup on unit cost
- Unit cost total: view only.
- (unit cost * (1 + unit cost markup))
Sub totals
- Subtotal: view only field
- (material total + labor total + subcontractor total)
- Subtotal markup: a percentage markup on subtotal
Totals
- Total: total price, calculated and overridable
- (subtotal * (1 + markup))
- Cost: view only field. total cost before any of the markups
- (material subtotal + labor subtotal + subcontractor subtotal)
- If you overridden unit cost, that would be used instead
- Profit: view only field.
- (total - cost)
- Margin: view only field.
- (profit / total)
Labor days
- Total labor hours: view only field
- (labor amount * unit amount)
- Crew size: number of workers
- Labor days: view only field
- (total labor hours / crew size)
Vendor quotes
This is a popup accessible from the navbar- The rows match 1:1 to the rows in the estimate table so you can have vendor quotes for any of the items.
- You can add new columns (vendors) with the button in the top right.
- This is essentially a way to have more placeholder columns in the estimate table. The blue circles mean that this number of the lowest in the row across all vendors.
- Clicking on the blue circle copies over the value into the material cost column
- Solid blue means that it’s been copied over
- You can also copy values that are not the lowest. Upon hovering, a gray circle appears.
Database
There will be a section about the database itself here. This is just about how to use it in the estimate. There are 3 ways to access the database from the estimate table.Import to row
Clicking on the database icon in the name column opens up the database popup.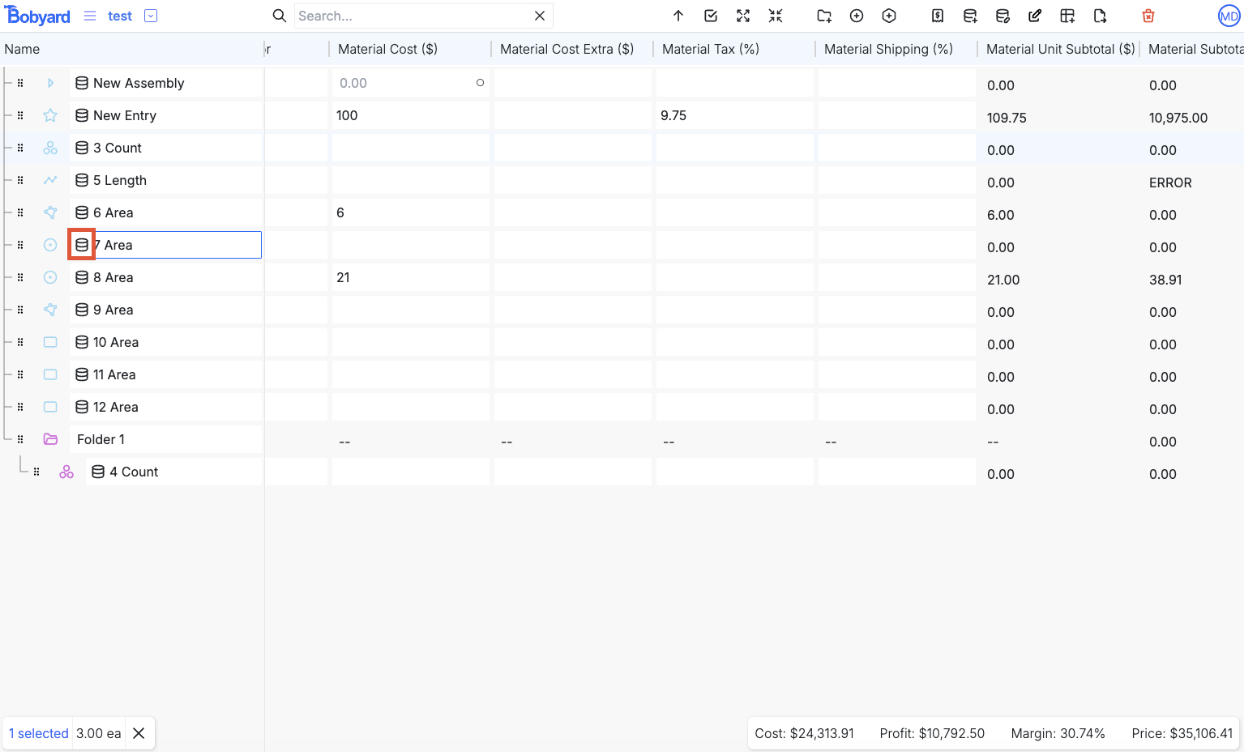
Database direct import
Instead of copying the values of a row in the database to an existing row in the estimate table. You can copy an entire row and create a new row in the estimate table. You can also create entire folders (all rows inside will also be copied over) The button for opening up the database popup for this is in the navbar.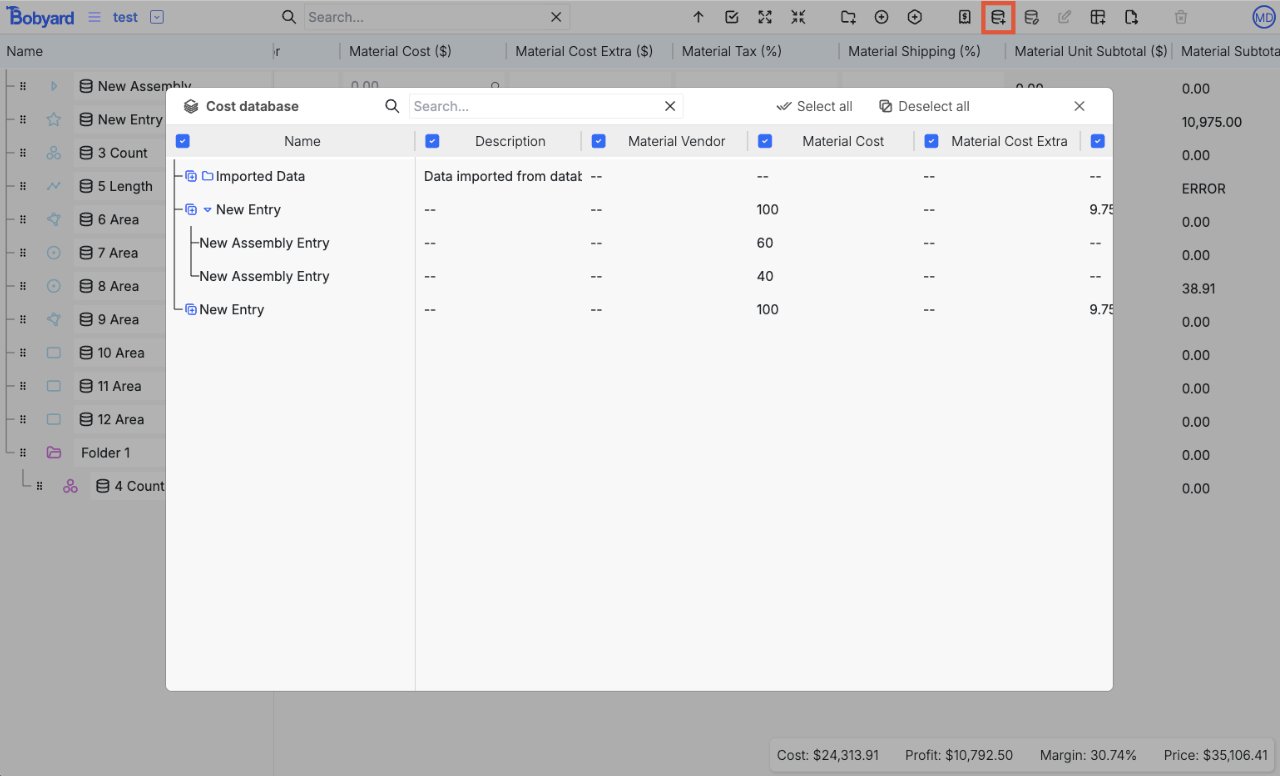
Database multi import
You can multi select rows in the estimate table and copy values from the database over to all the selected rows.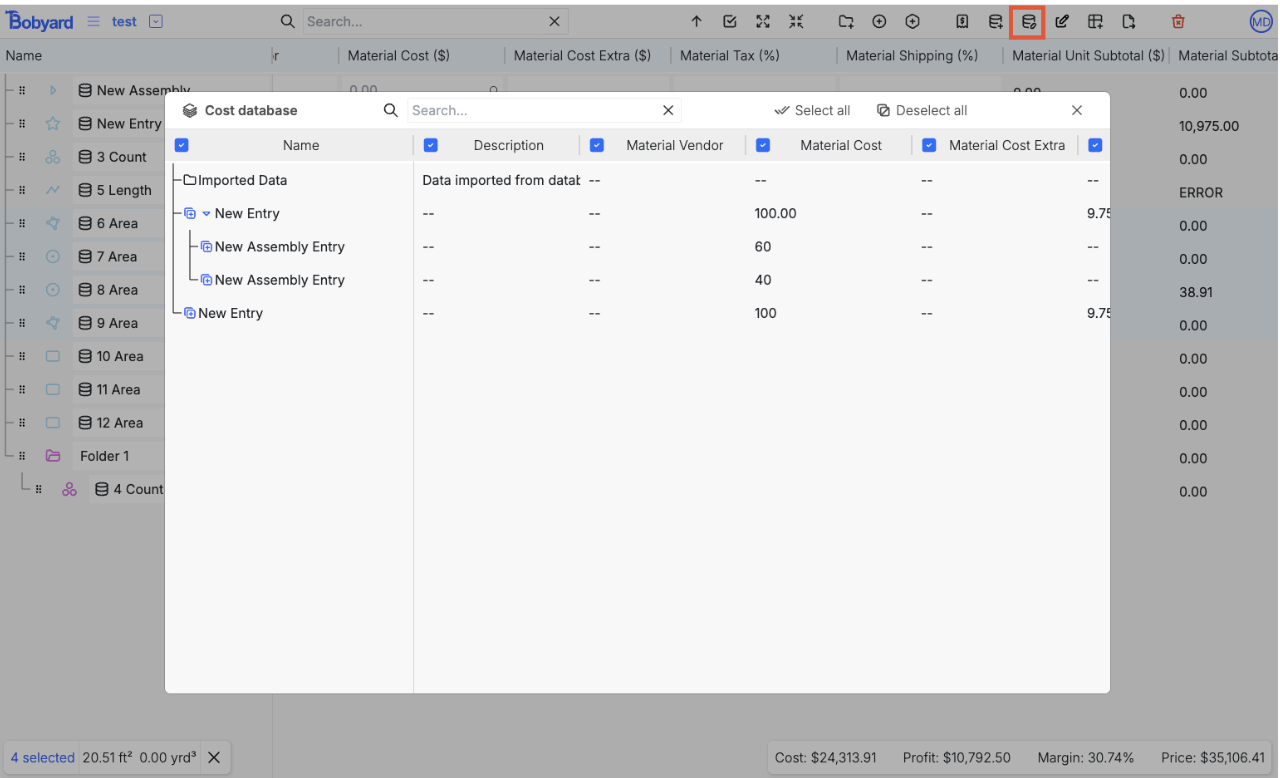
Exports
There are 6 export options All of them work in the same way. “What you see is what you get.” If a folder is collapsed in the estimate table, it will be collapsed in the export. If a column is hidden, it will be hidden in the export.Export to CSV
Downloads a CSV of the values from the estimate tableExport to excel
Downloads a .xlsx file with the values from the tableExport to pdf
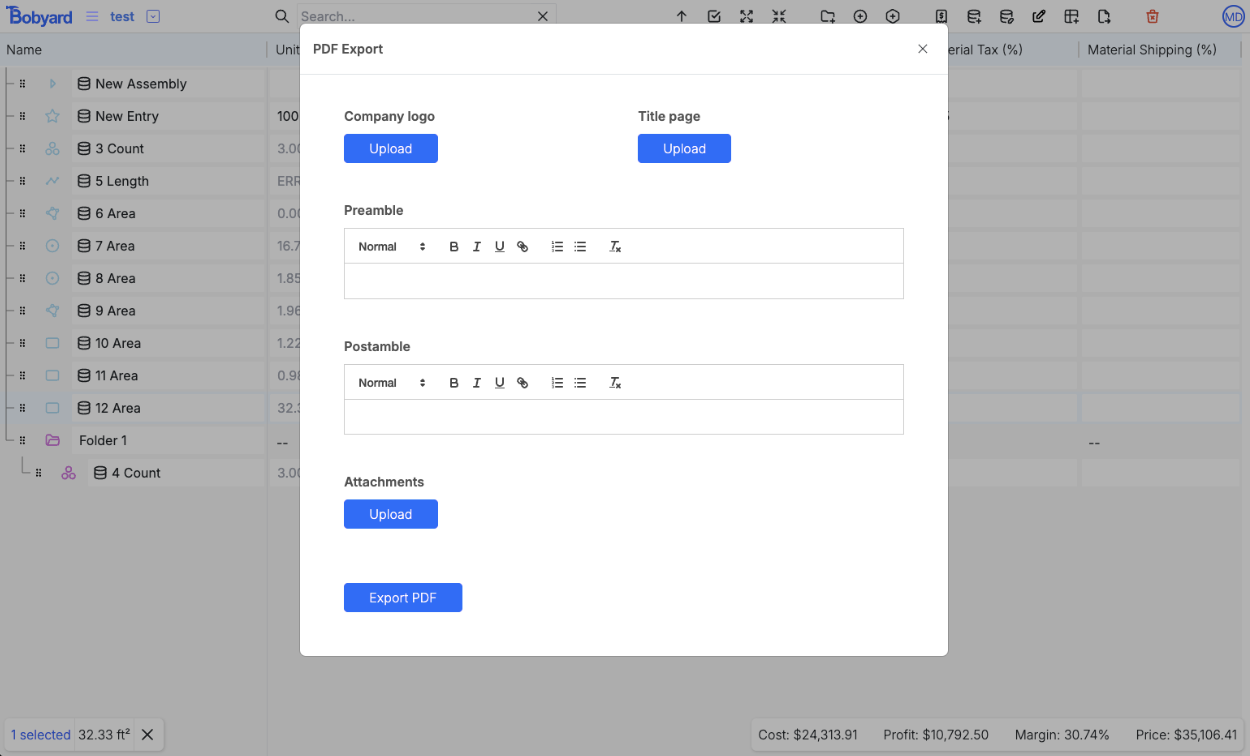
We cap the number of visible columns for the pdf export to 12 (we can only fit so many in a page).- You can upload a logo, it will be placed top left on the first page
- You can also upload a title page, it will be appended to the front of the pdf before the first page we generate
- Preamble goes on the first page
- Postamble on a page after the table
- Attachments can be images or pdfs (can reorder after uploading) are appended to the end of the pdf.
Export selected rows to CSV, Excel, and PDF
These options behave just like the previous exports except only the currently selected rows in the estimate table are exported. For example, if you wanted to export just the plant list, select all the rows in that folder, and export with one of the selected export methods.Estimate edit history
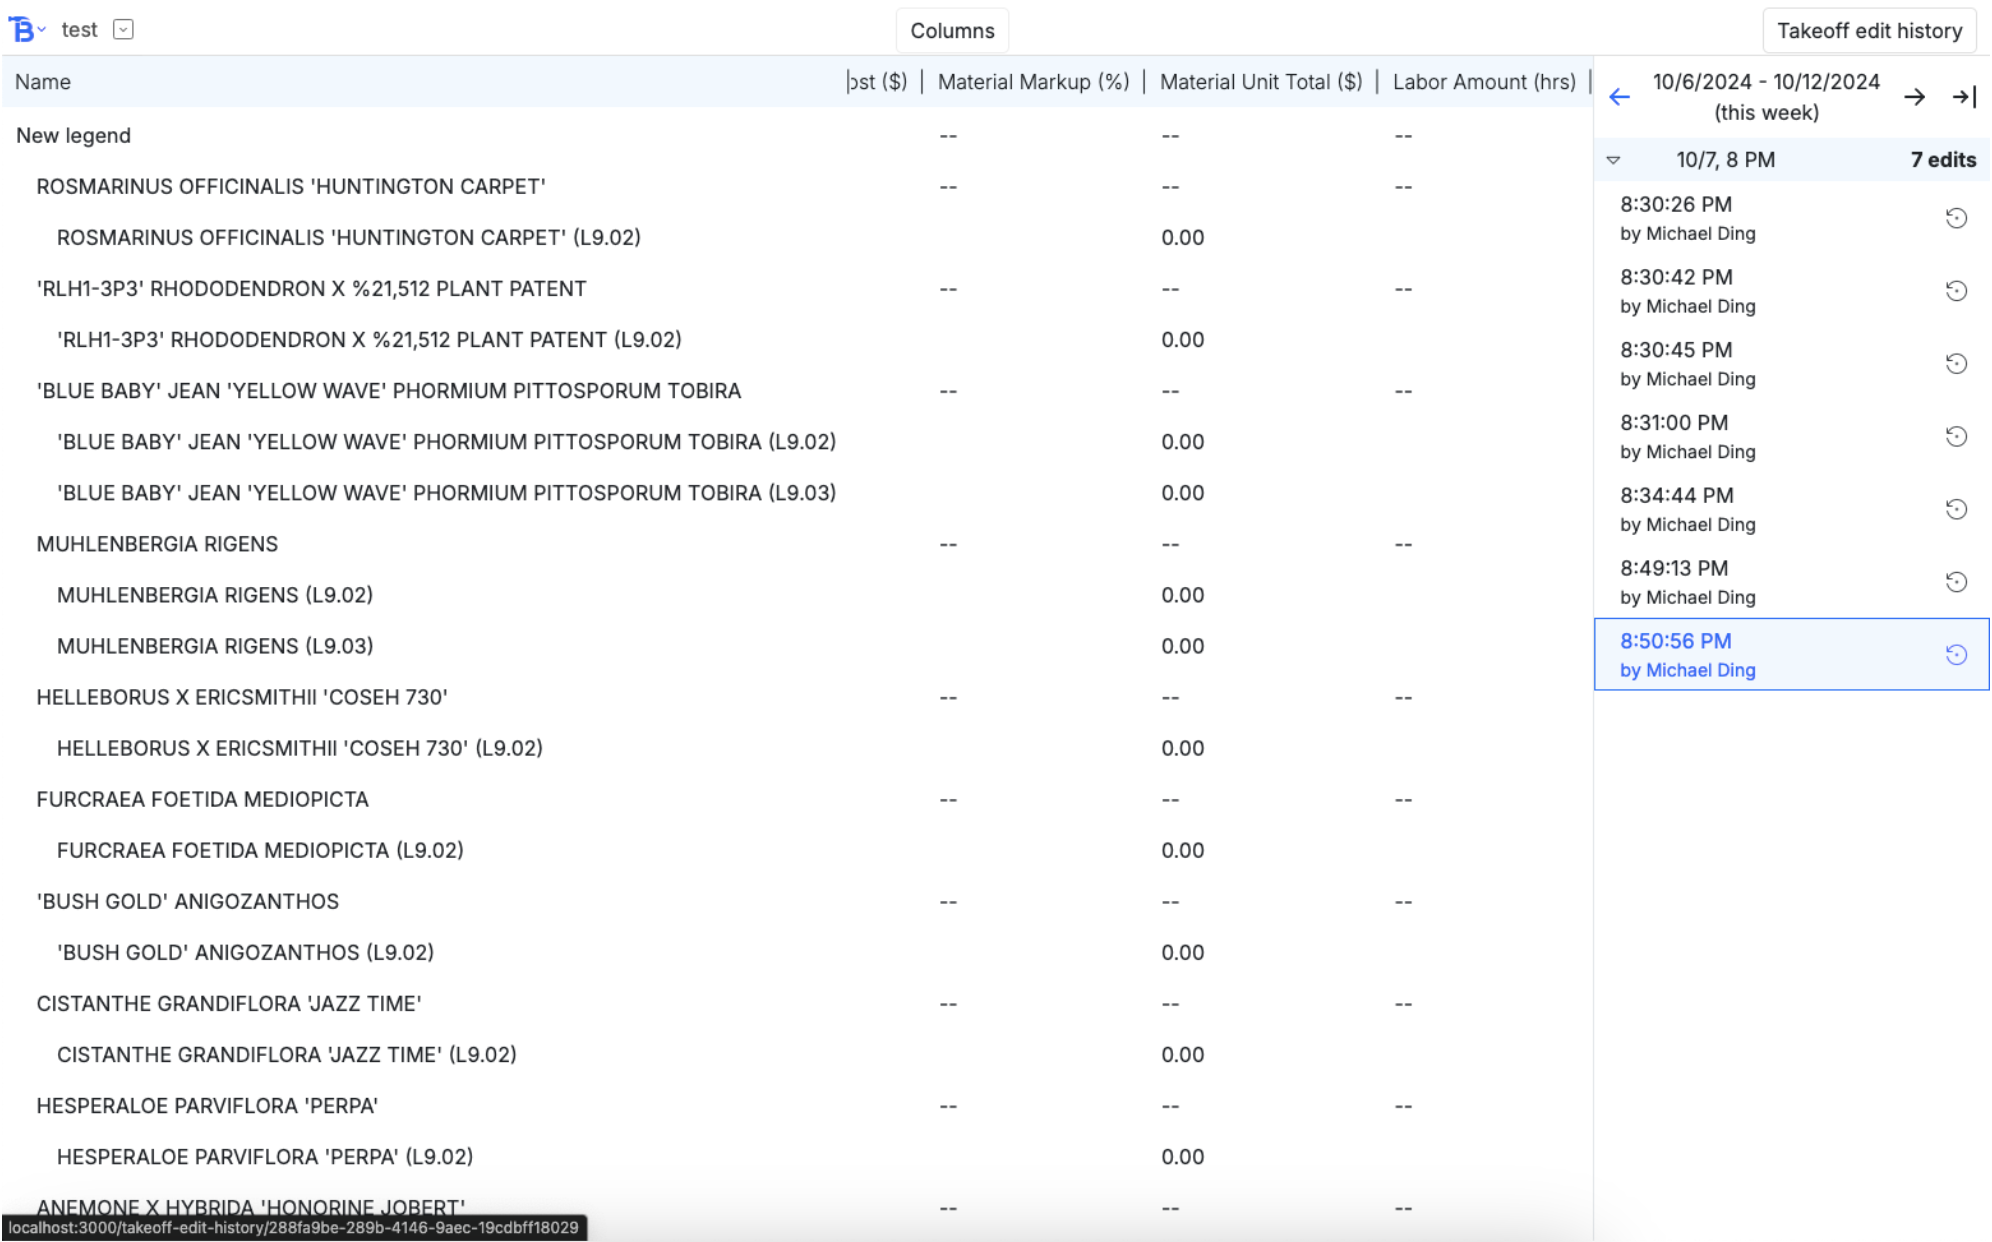
- The navbar
- The estimate table render
- And the edit history sidebar
Navbar
Left to right, the buttons:- Bobyard icon legs you navigate to the other pages in the project
- Displays project name
- Drop down for you to navigate to the estimate edit history of another project
- The columns button in the middle lets you toggle the visibility of columns
- On the far right, a button that takes you to the takeoff edit history