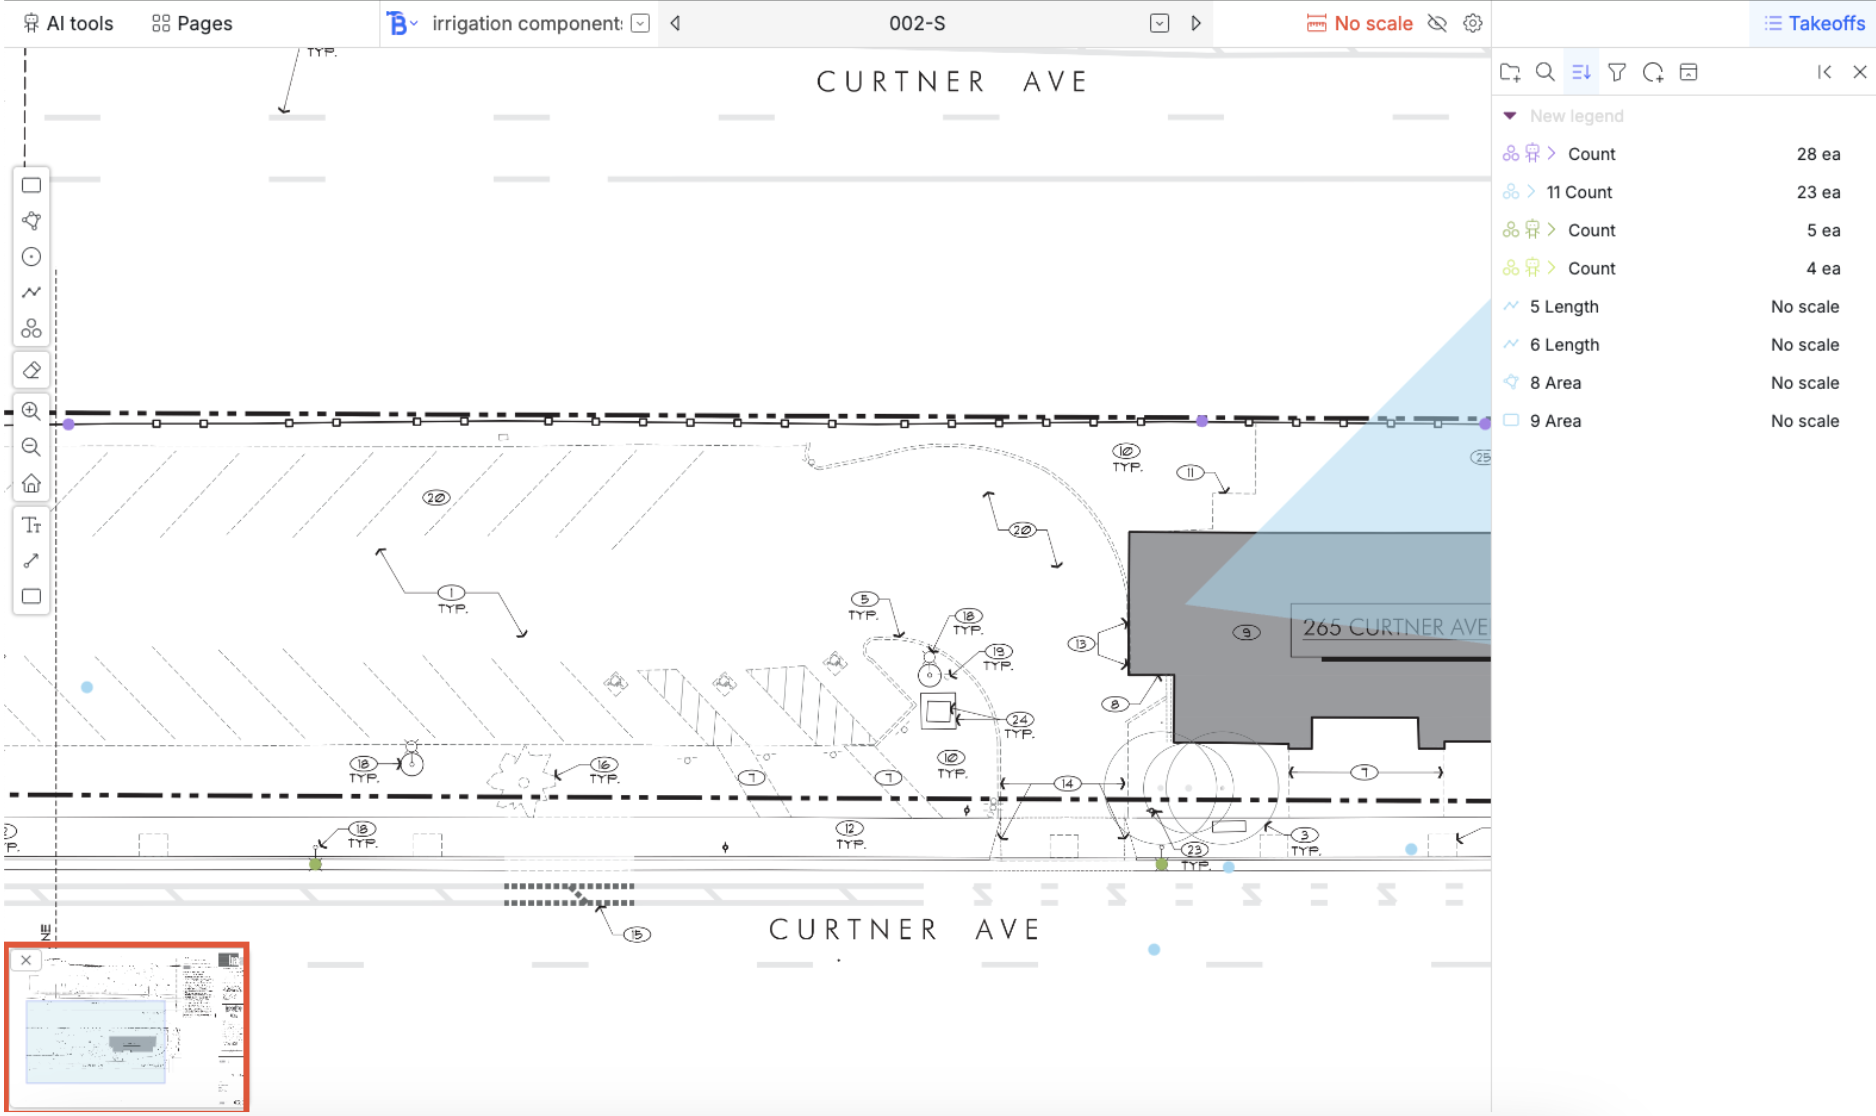
Takeoff page overview
There are a few main components that make up the takeoff tool.The drawing
You can drag, pinch, and scroll on the drawing to navigate.On touchpad
- use two fingers to pan or drag
- Pinch to zoom in and out
- Hold down control and scroll to zoom in and out
On mouse
- Drag with mouse to move around
- Scroll to pan up and down
- Hold shift and scroll to pan left and right
- Hold control and scroll to zoom in and out
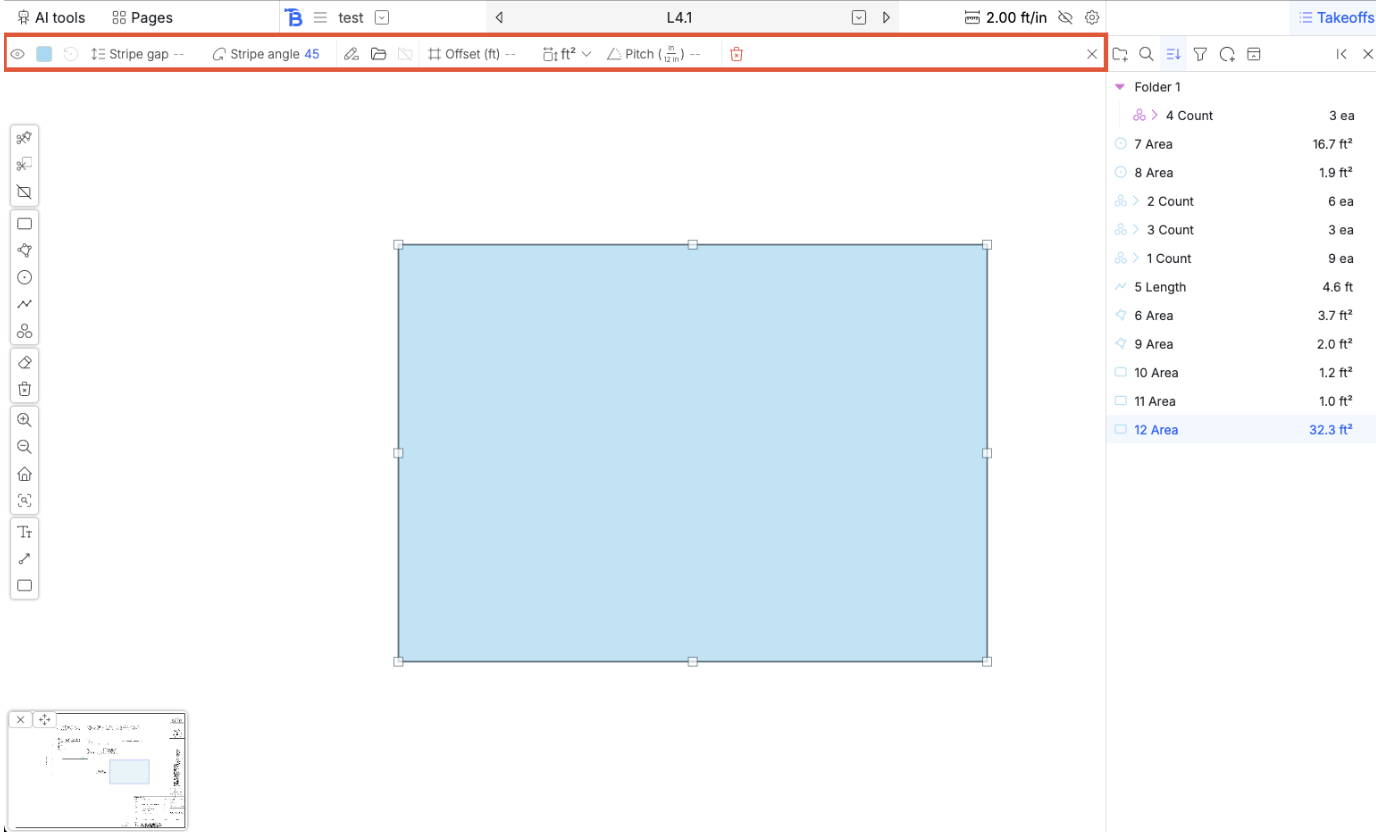
Navbar
The left side of the navbar and right side of the navbar is used as a docket for the sidebars that you have pinned on that side. By default the AI tools and pages sidebars are pinned on the left and you can toggle their visibility by clicking on them in the navbar. Similarly, the takeoff sidebar is on the right.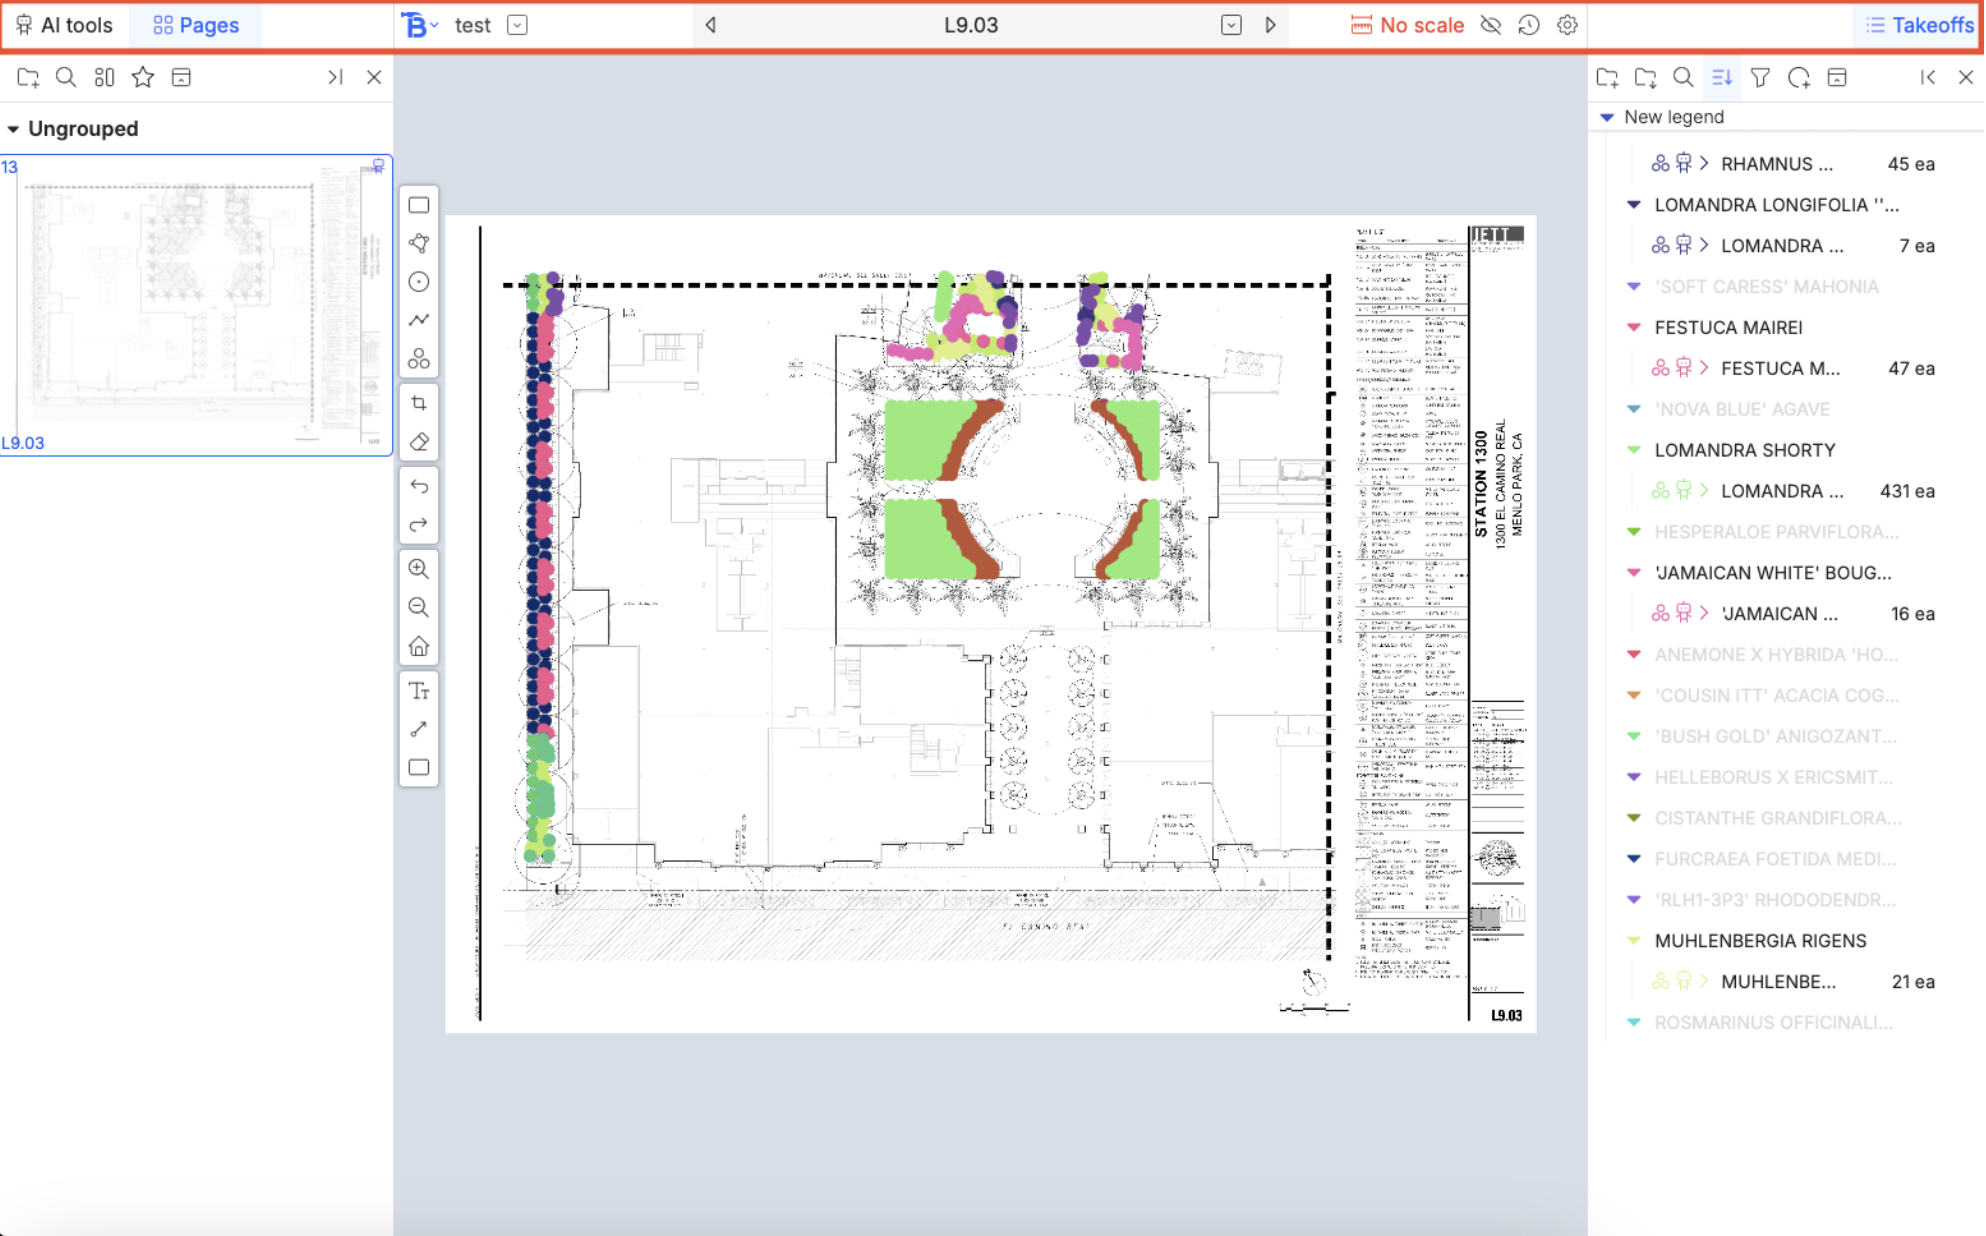
- The Bobyard logo opens a dropdown menu to navigate to the project files, estimate and other pages for this project
- “Test” is the project name here, clicking on it opens up a popup for project details
- The down arrow button lets you navigate to the takeoff page of other projects
- The left arrow lets you navigate to the previous page
- Double clicking on the name of the page lets you rename it
- The down arrow in the gray name box lets you navigate to the to other pages
- Right right arrow lets you navigate to the next page
- The scale button opens up a popup to scale the page. There are 3 ways to choose the scale:
- You can choose one of the default options
- You can manually type one in. This requires all 4 numbers so if your scale is 1” = 10’ 0”, you would need to input 1 / 1” = 10’ 0”
- You can draw a scale. Once you start, draw a line by clicking once to start and again to finish on the drawing. You will then be asked to type in the corresponding length in feet and inches of the length you just drew.
- Hovering over the crossed out eye button hides all annotations and takeoffs on the page
- A button that takes you to the takeoff edit history page
- The gear symbols opens a popup that can take you to settings about the takeoff page (we will talk about this here)
- You can also download the original page
- Or download the takeoff (with annotations and measurements)
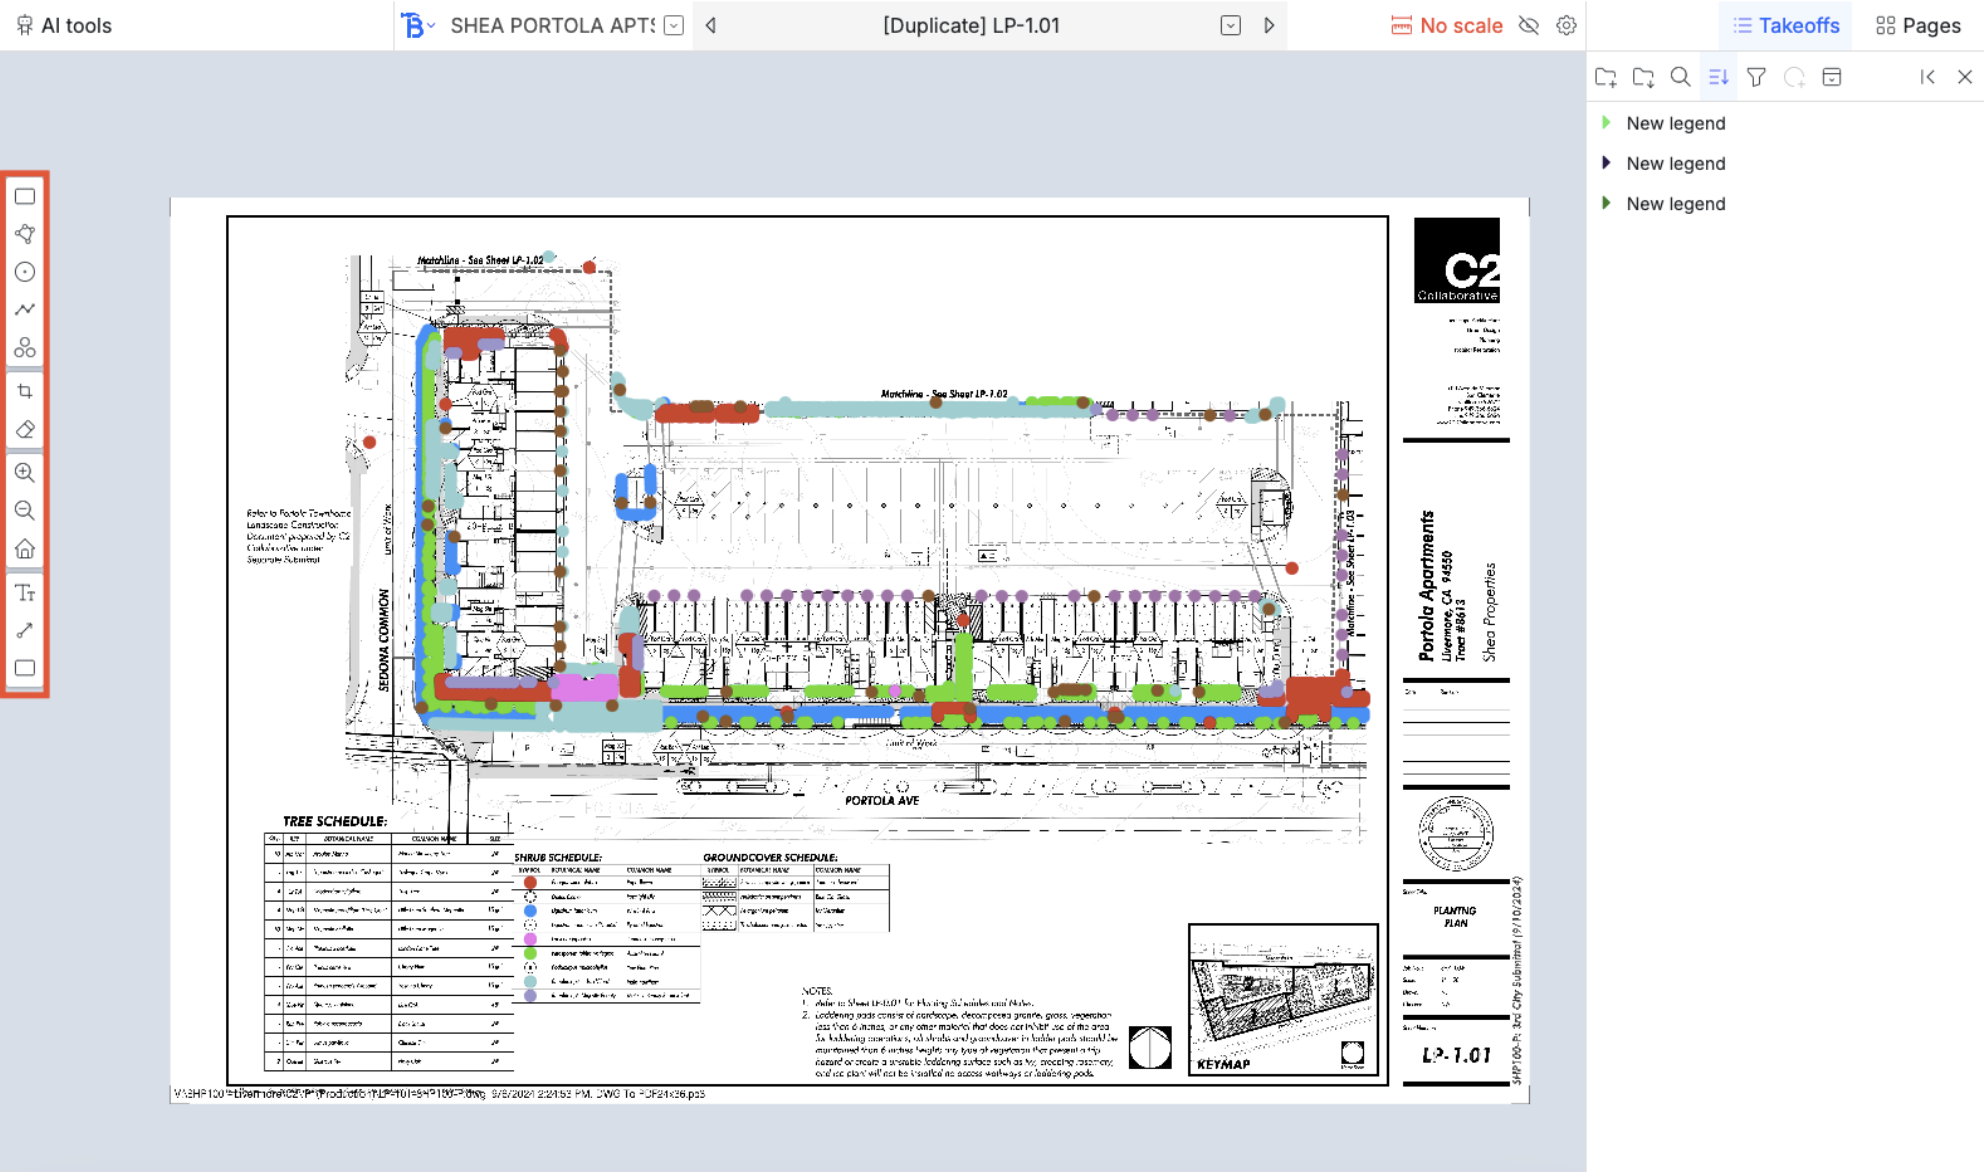
Toolbar
This is located on the left side of your screen and has all the functionality for a manual takeoff. Hovering on the buttons will show you what the buttons do. Going top to bottom the tools are:- Drawing a rectangular area
- Draw a polygon
- Draw a circle
- Draw a length
- Draw counts
- Draw a polygon to calculate intersections (selection calculator)
- This will give the number of dots, length of lines, area of shapes cut out with the polygon
- Draw a negative rectangle that erases all counts inside
- Zoom in
- Zoom out
- Reset zoom
- Draw a sticky note
- Draw an arrow
- Draw a highlight
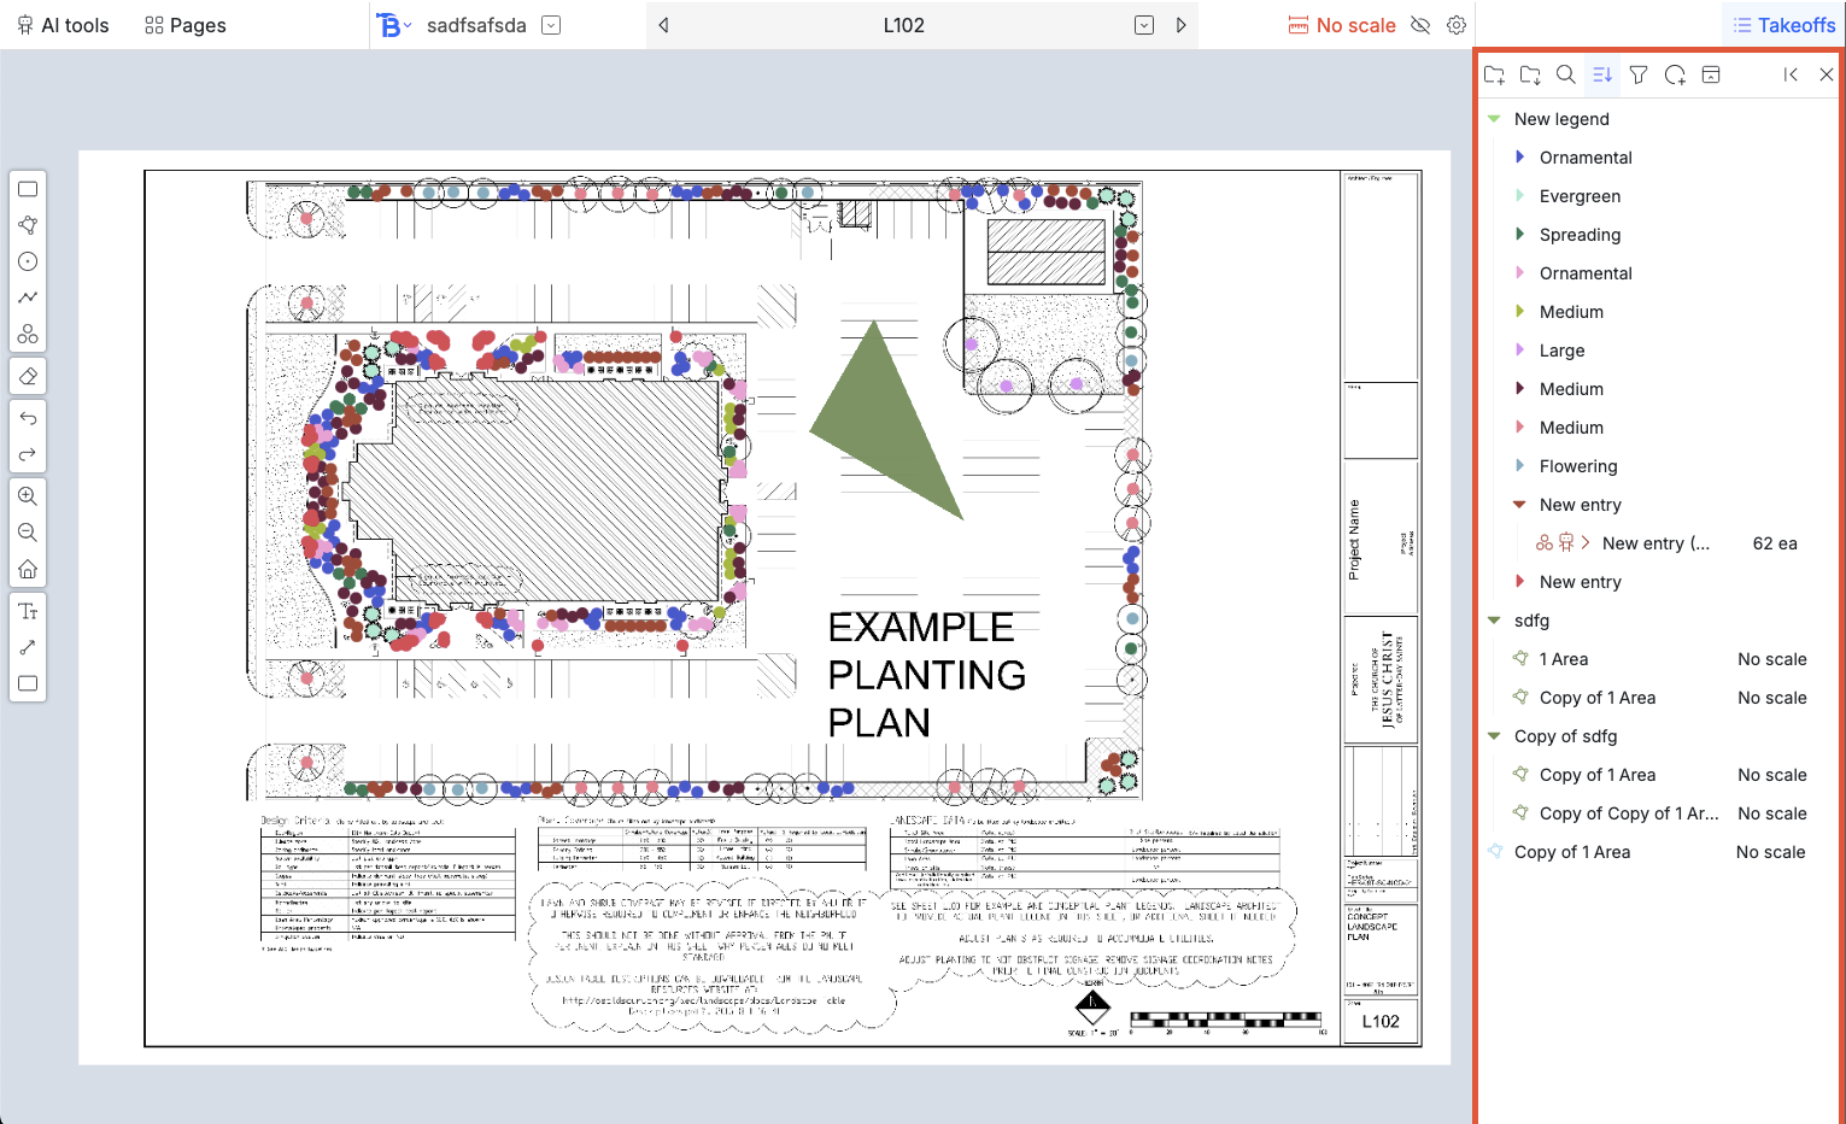
Takeoff sidebar
The takeoff sidebar has several tools at the top. From left to right:- Creating a new folder
- Import folders: You can choose to copy over folders from your database
- Searching for folders and measurements
- Sorting the items by type, name, etc
- Filtering the measurements by count, length, other pages, etc
- Expanding all previews. When counts are counted, each dot is cropped and saved so you can easily double check your work. This button expands all the counts.
- Expand all folders.
- Pin the sidebar to the right
- Close the sidebar
Details navbar
When you have a measurement selected, the details navbar will appear under the navbar. (or if you have multiple selections, the actions will apply to all of them). It has a bunch of tools to customize the appearance/conditions of the measurements. We will talk more about them in each of the tools here.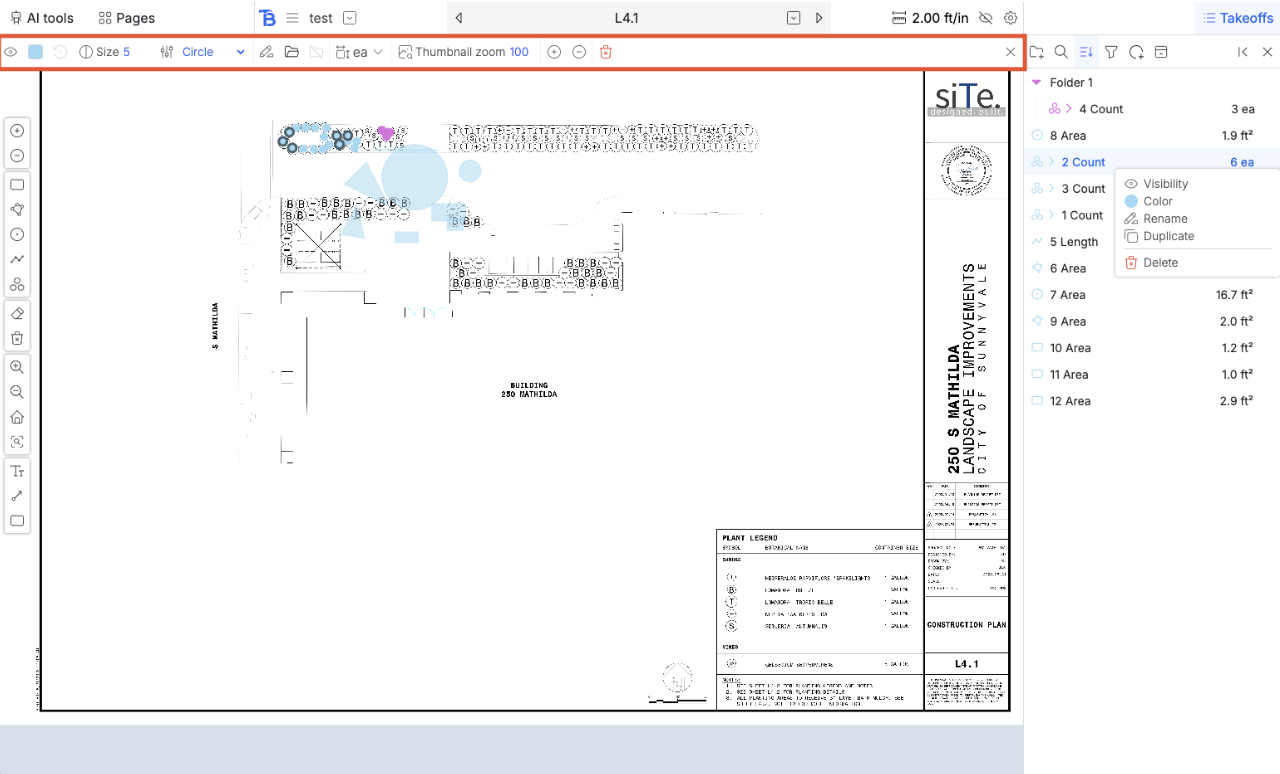
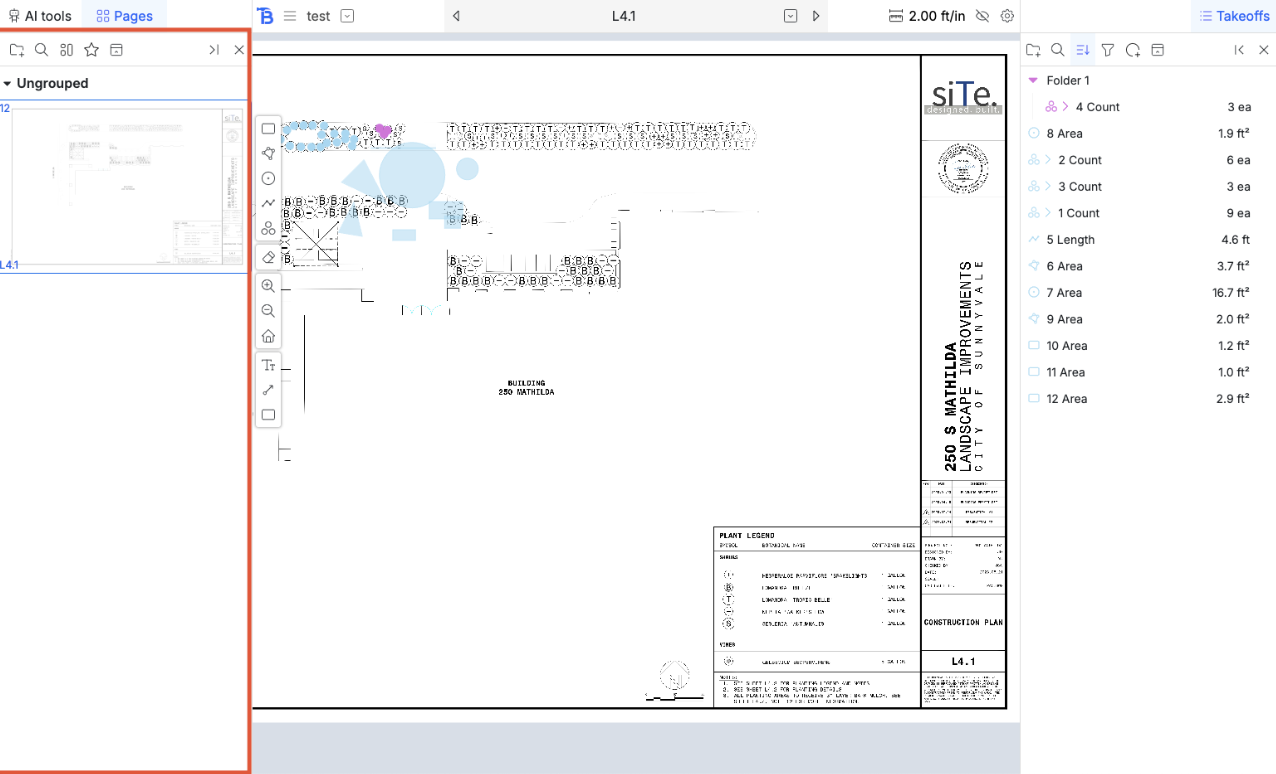
Pages sidebar
This sidebar has previews of all the pages and some tools at the top. From left to right:- Create a folder
- Search of a page or folder
- Change the view from list of names to grids of pages, to page by page
- Folder to only show starred pages
- Collapse all folders
AI sidebar
This sidebar has the options for all the AI tools in the platform. The top has a few tabs that you can toggle between for showing different types of AI models. More details in the AI takeoff section here.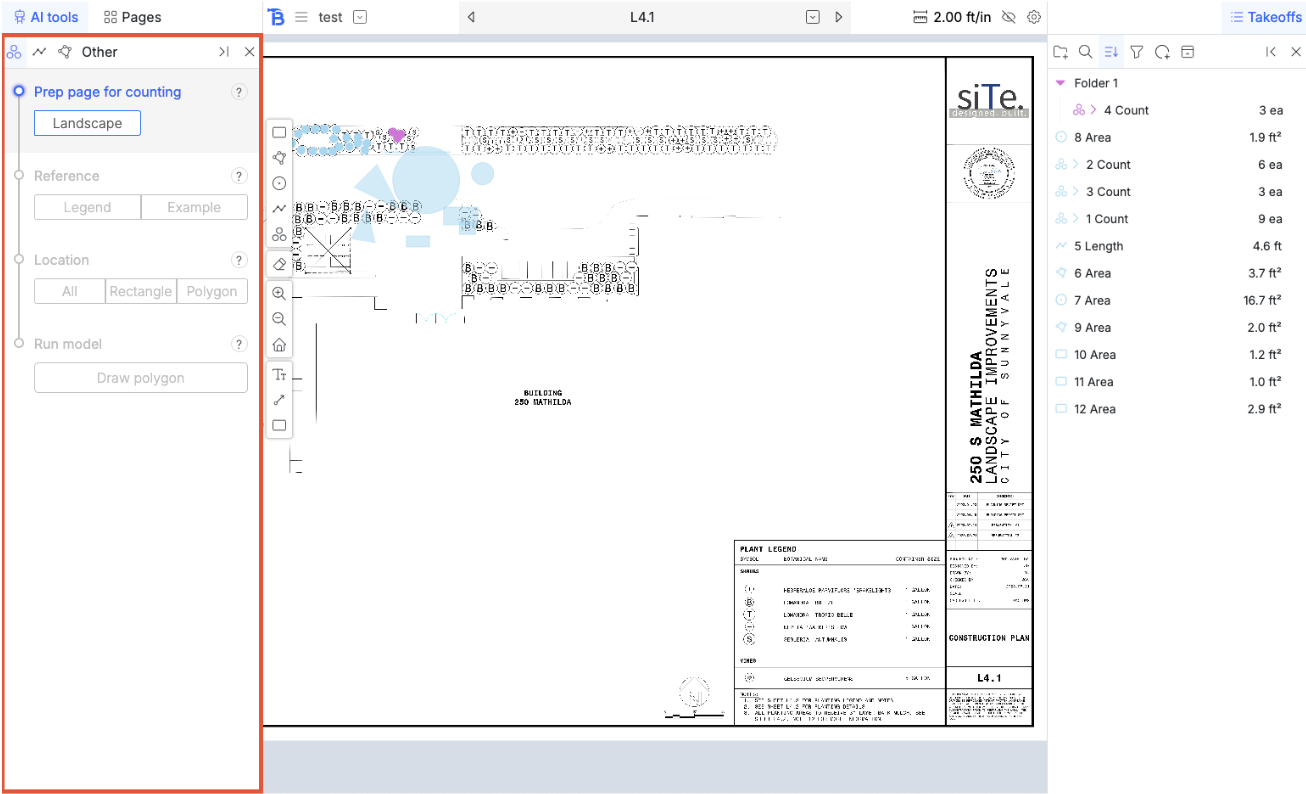
Toolguide
When you have a tool activated (like the rectangle tool in this case), a tool guide will appear at the bottom of the screen with tips on how to use the tool and the key bindings for them. This applies to the tools in the toolbar and AI tools.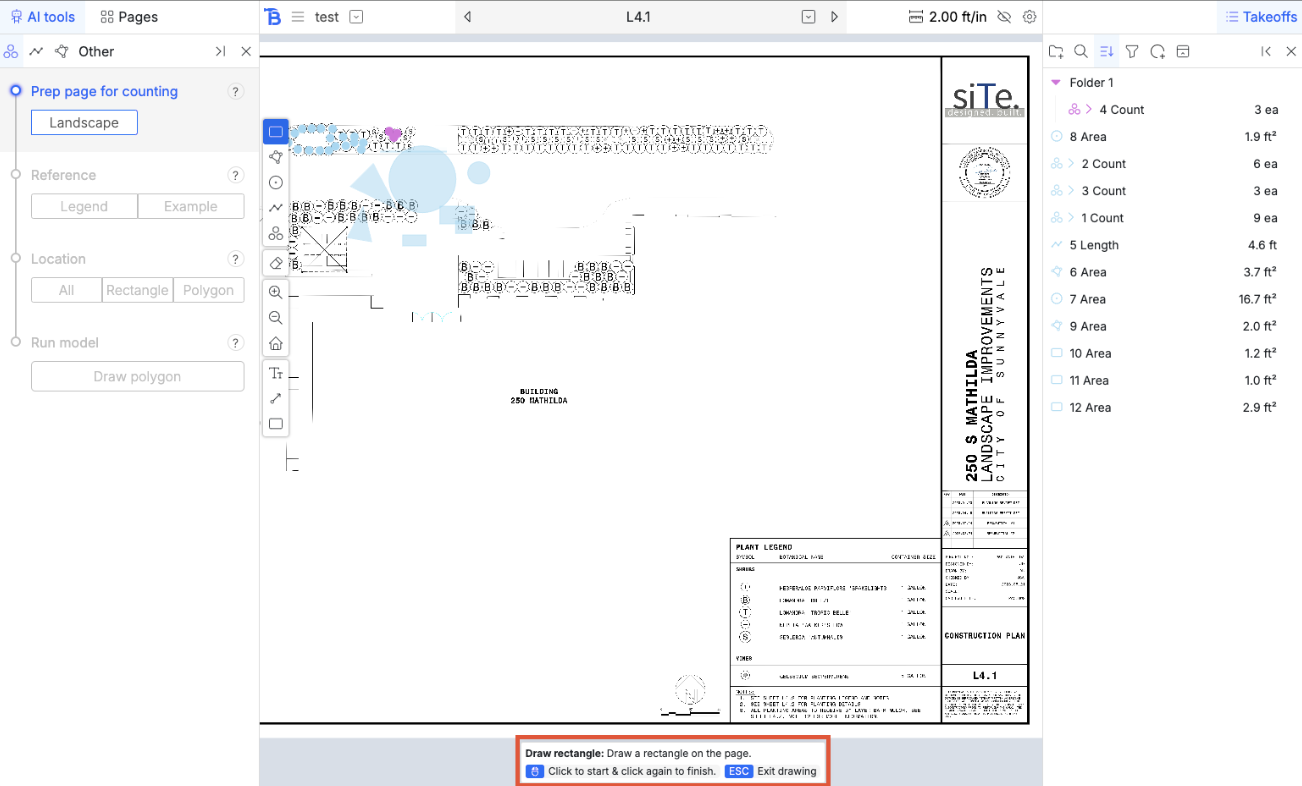
Measurements
We will detail how each of the major tools/measurement types in the toolbar workRectangle
Drawing
Once you have the tool selected, the button in the toolbar turns blue. Click to place a corner, and click again to finish. When the tool is activated, it will not deactivate after you finish a rectangle. Either click on the button in the tool bar again or hit ‘escape’ to stop the tool.Editing
You can click on a rectangle to select it. Once selected, you can drag it to reposition it. Or drag any of the 8 little white squares to resize it.
- Converting to a polygon
- Converting to a length
- Cut with a negative polygon
- Cut with a negative rectangle
- Split with a line
- Duplicate
- Zoom
- Delete
- Cutting a polygon out of the rectangle
- Cutting a rectangle out of the rectangle
- Splitting the rectangle with a line

Details navbar
Form left to right, the details navbar for the rectangle has:- Toggle visibility
- Change color. If you change the color, use group color will be turned off
- Use the group’s color. (if this is on, whenever this measurement is moved to a group, it’s color will change to the new group’s color)
- Gap spacing for is you want to fill the rectangle with strips (purely visual)
- The angle for the stripes (purely visual)
- Rename
- Group it (will open a popup of folders for you to choose to move to)
- Ungroup (will move it out of all folders)
- Offset amount
- Unit of measurement (dropdown menu of the desired unit to be converted to. Rectangle are default ft squared and you can convert this to ea, ft cubed and many others)
- When you are converting, new fields will appear to make the conversion possible. For example, if you are converting from area to volume, a field will appear asking for the length of the 3rd dimension
- If you choose to convert to EA, there will be a visualization of the OC points
- If you choose to convert this area to a length, there will be a visualization of lines OC
- If you choose to convert this area to a * length, there will be a visualization of grid lines OC
- If you have an offset, these calculations are done on the area after the offset
- Pitch. The amount of rise in inches for every 12 inches of run
- Close the details navbar (also deselects the measurement)
Polygon
All measurements follow a similar pattern to the rectangle.Drawing
Hitting ‘a’ after placing a dot will turn toggle that most recently placed dot to an arc and back. You can drag and reposition dots you placed while drawing. Click to place a vertex and keep clicking to place more. You can finish by:- Clicking on the first vertex
- Hitting ‘enter’
Editing
You can also cut and split the polygon like the rectangle. Right clicking on the polygon gives you similar options to that of a rectangle (including conversion to length) Right clicking on a vertex allows you to change it to an arc or back to a normal vertex.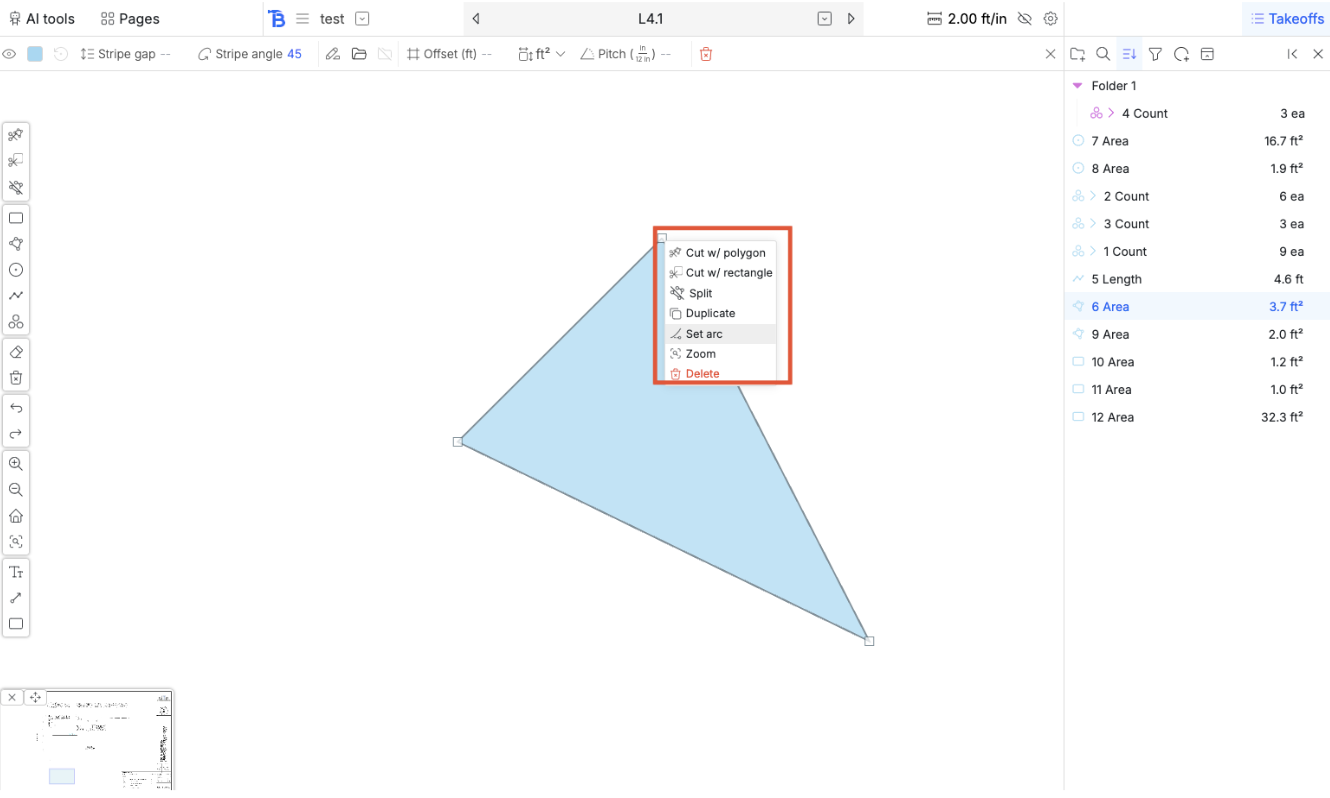
Details navbar
Same a rectangleCircle
Click to place the center, click again to place a point on the edge of the circle.Lengths
Just like the polygon expect it is not filled. Right clicking on vertices will also allow you to turn them into arcs. While drawing, hitting ‘a’ will toggle the most recently placed dot. The details navbar has the ability to change the thickness of the lines or make them dashed. (purely visual)Counts
Drawing
Click to place dotsEditing
Two new tools are available for counts at the top of the tool bar:- Adding new dots that go into this count
- Removing dots from this count (when this tool is activated, click on an existing dot in this count to delete it)
- Changing the count of the dot (it just opens up the takeoff sidebar and the crops so you can drag it).
- Adding more dots
- Duplicated the entire measurement
- Zooming to all the dots
- Zooming to just this one dot
- Deleting this dot
- Start deleting dots from this count (toggles on the tool)
- Delete the entire measurement
Merging
You might want to merge several counts into one measurement (maybe from several AI count runs or just different counts you made). Multi select the counts you want to merge and click on the merge icon on the far left in the takeoff sidebar. Or, you can right click on one of the counts and choose the merge option.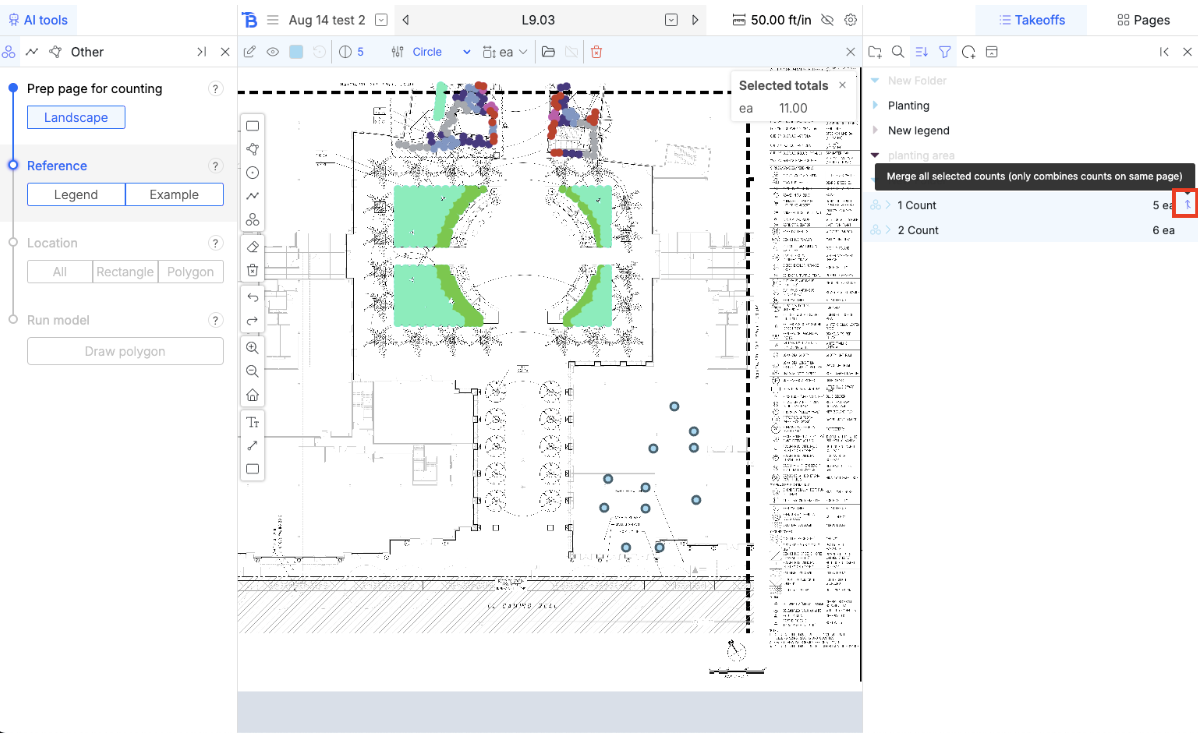
Details navbar
You can change the size and shape of the dots visually. You can also change the zoom level of the crops for the preview.Annotations
Text
Behaves just like a rectangle. Double click to edit the text inside. The details navbar lets you change the font size and colors.Arrow
Behaves like a length but only has two points. Details navbar lets you change colors and thickness.Highlight
Behaves like a rectangle, and the detailed navbar lets you change the colors.Groups
Left click on a group collapses and expands it.Selection
Left clicking also selects a group to be the active one. New measurements drawn will be automatically placed into the active group if a group is selected. Holding down control and clicking on groups lets you select multiple groups to be active. Any new measurements drawn now will be copied into each group.Options
Right clicking on a group gives you the option to:- Toggle it’s visibility
- Change its color: when a new measurement is placed into this group, it will automatically adopt its color (unless you’ve chosen a specific for that measurement already)
- Rename it: all sub folders and measurements inside will be duplicated as well
- Add subgroup
Importing template groups
Clicking on the import groups button in the takeoff tools opens up a popup to let you import groups from the database.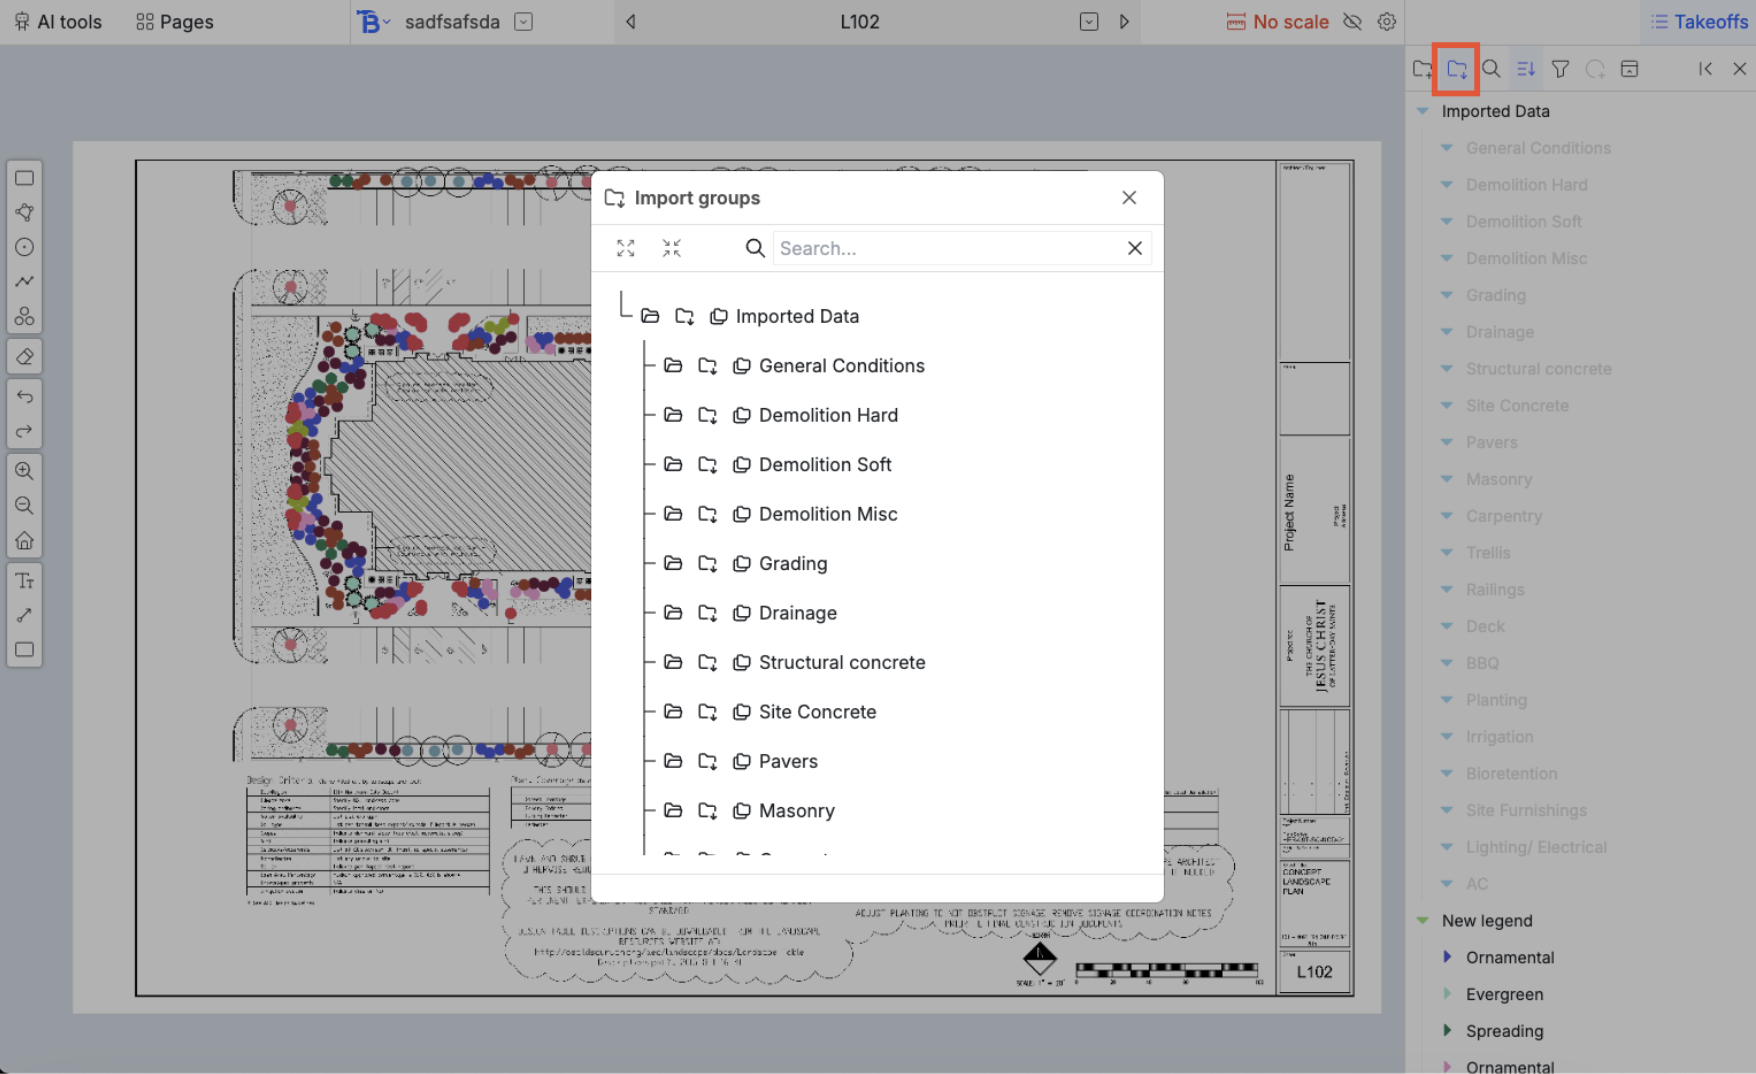
- Toggling expansion or collapse
- Import only that one group
- Import that group and all the groups inside it as well
Takeoff edit history
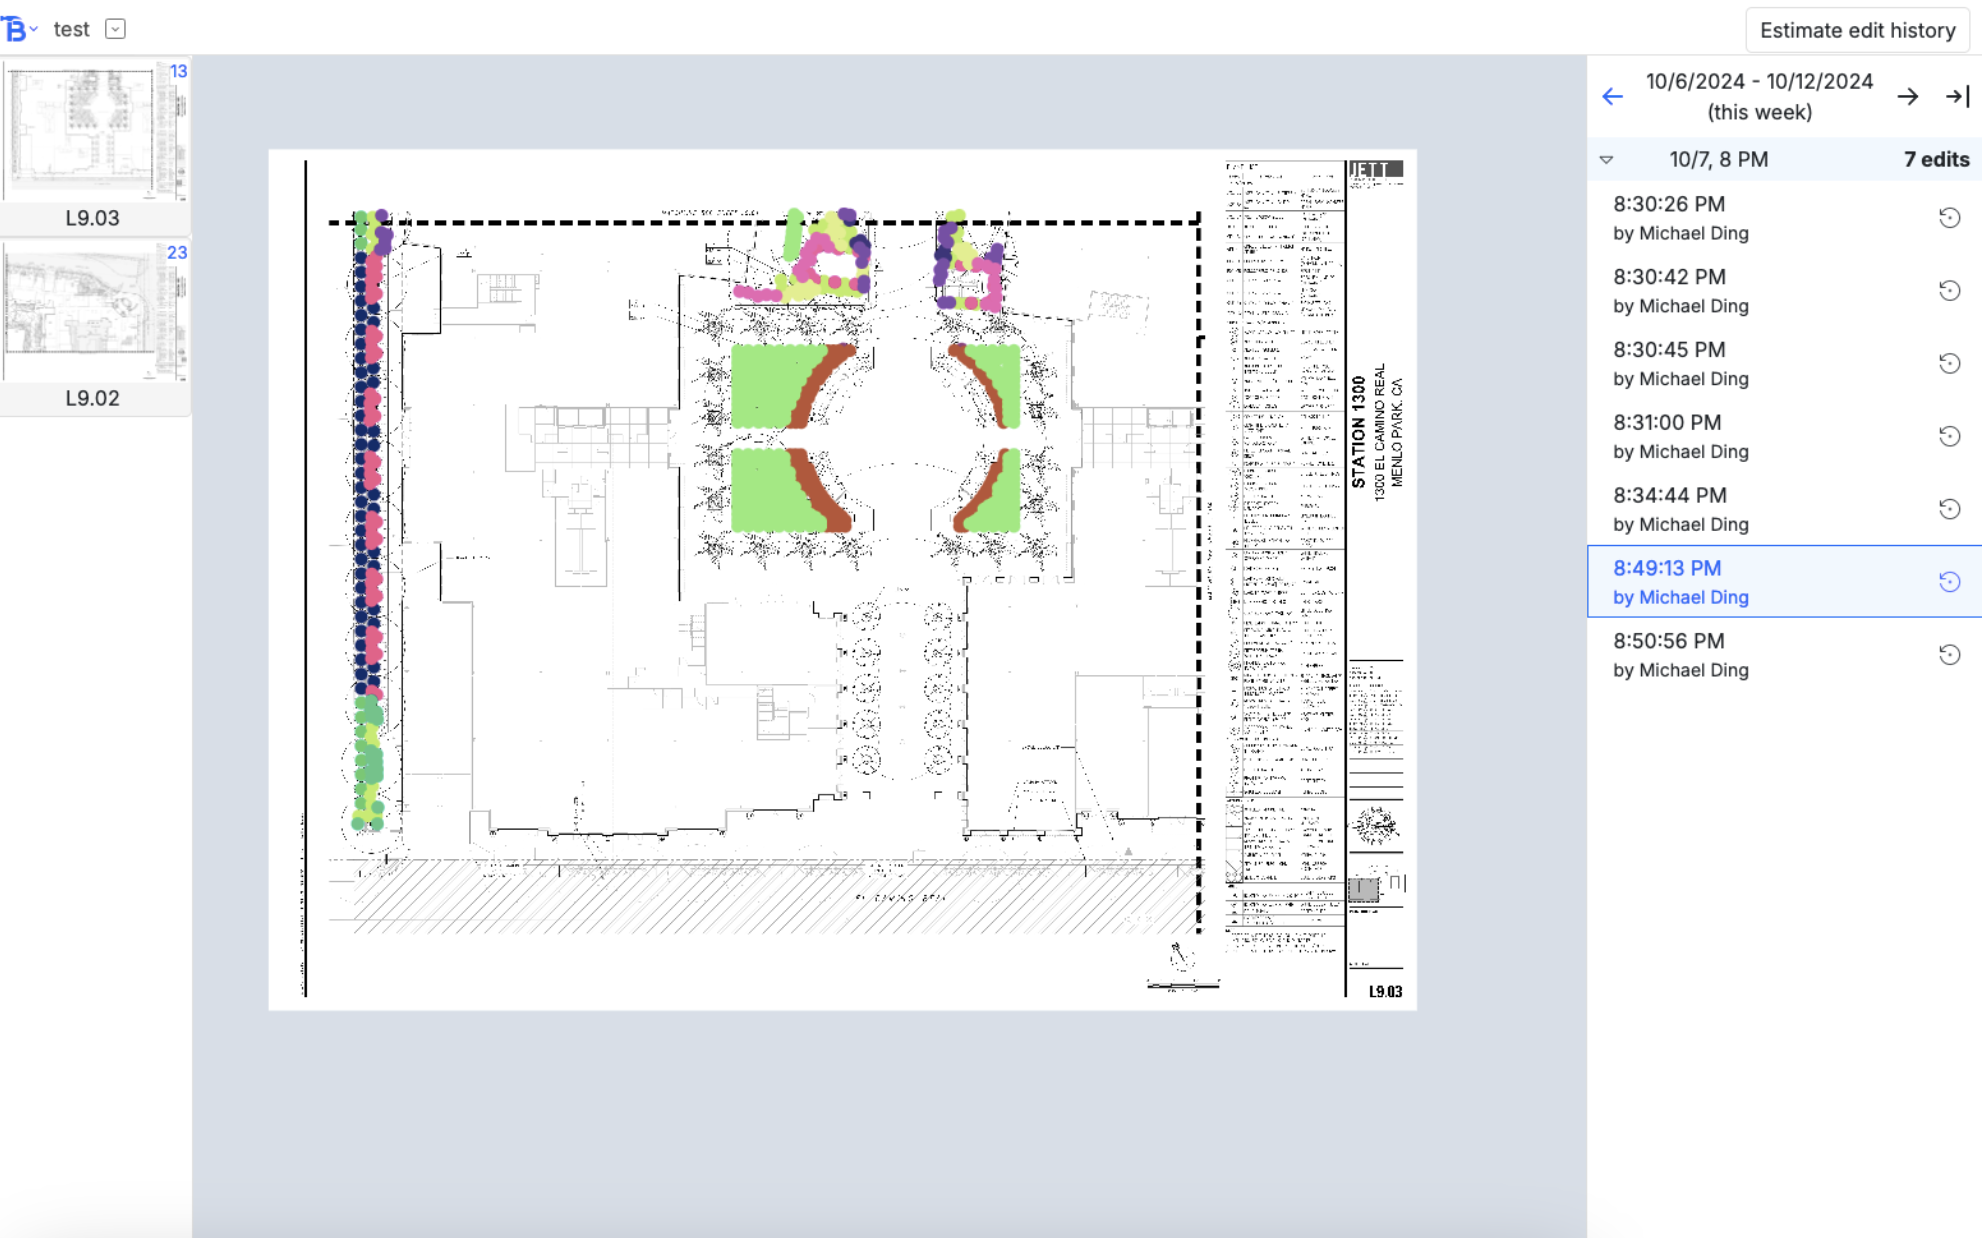
- The navbar
- The left pages sidebar
- The takeoff render
- And the right history sidebar
Navbar
Left to right, the buttons:- Bobyard icon lets you navigate to the other pages in the project
- Displays project name
- Drop down for you to navigate to the takeoff edit history of another project
- On the far right, a button that takes you to the estimate edit history